

TL;DR:
- Patients leaving aesthetic clinics should carry a signed aftercare form, a direct emergency contact, and a scheduled follow-up plan. Detailed timelines, red-flag indicators, and treatment-specific aftercare are essential to ensure safety and effective recovery. UK regulations emphasize documentation, structured follow-up, and immediate escalation for serious complications.
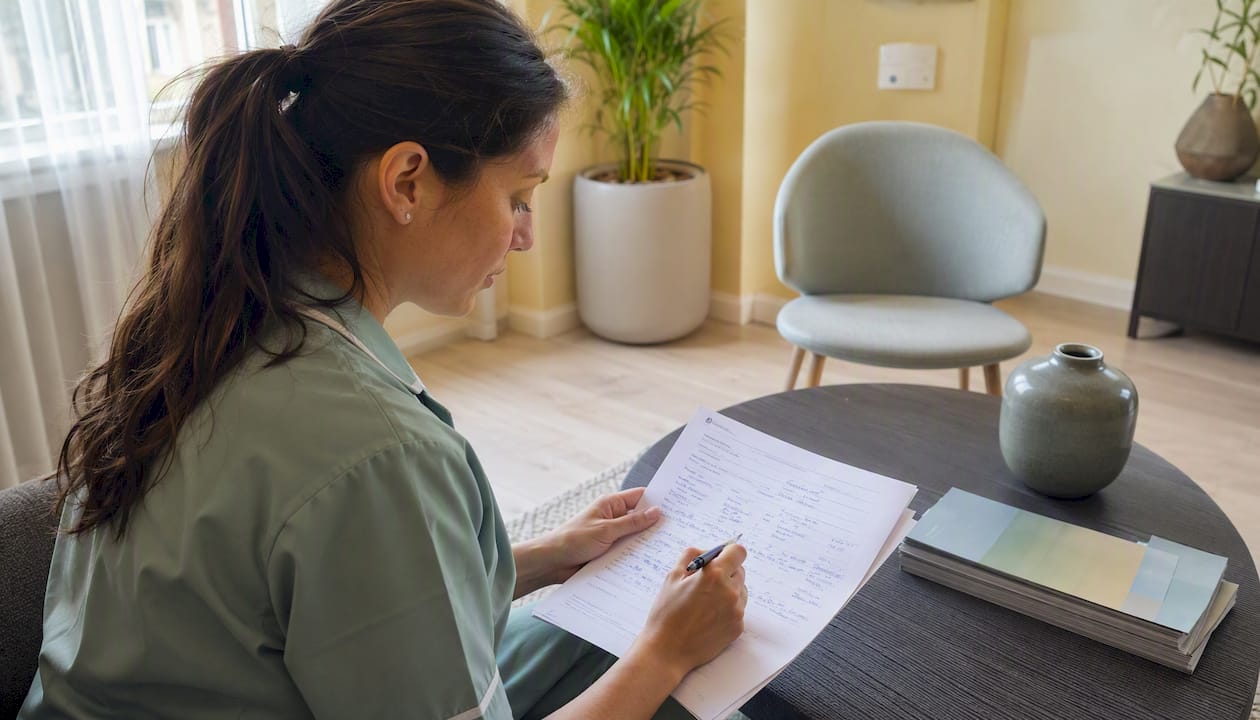
Every patient who leaves a medical aesthetics clinic should carry three things: a signed written aftercare form, a direct emergency contact number, and a clear understanding of when the clinic will next check in. That is the minimum a proper patient follow-up workflow must deliver. Under JCCP SOP guidance.pdf), clinics must observe you for 15–30 minutes immediately after treatment, provide written post-treatment instructions, and supply a 24-hour emergency contact before you leave. CQC Regulation 12 (Safe Care and Treatment) requires that aftercare is not just given but documented and signed, forming part of the clinic’s inspection evidence.
Before you leave the clinic, confirm you have received:
- A signed aftercare form specific to your procedure (not a generic sheet)
- The clinic’s direct emergency contact number, available 24 hours
- Confirmation of your first scheduled check-in (within 24–48 hours)
- Clear written guidance on red flags and what each one means
Pro Tip: Photograph your aftercare form before you leave. If you misplace the paper copy, you still have the red-flag list and emergency number on your phone.
Table of Contents
- What your follow-up timeline looks like from day one to three months
- How aftercare differs for Botox, fillers, and other procedures
- How UK regulations shape the follow-up process
- How clinics communicate follow-up and why automation matters
- Red flags and exactly what to do if something feels wrong
- How rebooking, touch-ups, and your two-week review work
- Key takeaways
- Why follow-up is the part of aesthetics that actually matters
- Theaestheticsroom’s follow-up care and how to book
- Useful sources for further reading
What your follow-up timeline looks like from day one to three months
A well-structured care coordination workflow runs across several defined windows. Each touchpoint serves a different clinical purpose.
- Same day (0–30 minutes post-treatment): You remain in the clinic for a minimum 15–30 minute observation period. The clinician monitors for immediate reactions, confirms you feel well, and delivers a verbal aftercare briefing before you sign and receive your written instructions.
- Hours 2–48: An automated aftercare message arrives by SMS or email, confirming key recovery guidance and prompting you to report any concerns. This is the triage window for early swelling, bruising, or red-flag symptoms.
- Day 7: A short progress check, typically by phone or secure message, gauges how you are settling and captures any concerns before the formal review.
- Day 10–14 (Botox) or 2–4 weeks (fillers): A clinical assessment to evaluate results. For Botox, this is the window for reviewing asymmetry or minor top-ups. For fillers, it allows the swelling to resolve so symmetry and volume can be properly assessed.
- 1–3 months: Maintenance reminders and rebooking prompts are sent based on your treatment type and the clinician’s recommended interval.
Throughout this timeline, before-and-after photographs and check-in notes are added to your patient record, building the audit trail required under JCCP documentation standards.pdf).
Pro Tip: Keep a brief symptom diary for the first 48 hours. Note swelling, bruising, and any unusual sensations with timestamps. This makes triage calls faster and more accurate.
How aftercare differs for Botox, fillers, and other procedures
Not all treatments carry the same risks or the same recovery pattern. A single generic aftercare form often fails patients precisely because the red flags for vascular compromise after filler are entirely different from the adverse-event pathway for botulinum toxin.

| Treatment | Onset / settling window | Clinical review timing | Key red flags |
|---|---|---|---|
| Botox | Onset 3–5 days; full effect ~14 days | Day 10–14 | Ptosis, difficulty swallowing or breathing, asymmetry |
| Dermal fillers | Immediate swelling; settles 2–4 weeks | 24–48 hrs + 2–4 weeks | Blanching, dusky or white discolouration, severe pain |
| Skin rejuvenation / energy devices | Redness resolves 24–72 hrs | 1–2 weeks | Blistering, prolonged erythema, pigment change |
| Fat-dissolving injections | Swelling peaks days 2–5 | 4–6 weeks | Nodules, skin irregularity, signs of infection |
Botox
Botox onset takes a few days, with the full effect visible after about two weeks. During that window, patients should avoid lying flat for four hours post-treatment, skip intense exercise for 24 hours, and avoid facial massage over the treated area. The follow-up review about two weeks after treatment is where the clinician assesses whether asymmetry needs a small top-up. Communicating this timeline clearly reduces anxious early enquiries, which is why JCCP guidance.pdf) explicitly includes expectation-setting as part of the follow-up process.
Dermal fillers
Fillers carry a small but serious risk of vascular occlusion. Blanching (the skin turning white) or a dusky, mottled discolouration around the injection site is a medical emergency requiring immediate contact with the clinic. An early check-in within a couple of days is therefore important for filler patients. The dermal filler aftercare form you receive must include explicit vascular-occlusion escalation instructions, not just general bruising advice.
Other procedures
Skin rejuvenation treatments and energy devices typically produce redness that resolves within a few days. Fat-dissolving injections cause swelling peaking a few days after treatment before subsiding. Both categories need scheduled reviews about one to two weeks and four to six weeks respectively, and any sign of blistering, prolonged erythema, or skin irregularity warrants earlier clinical contact.
Pro Tip: Ask your clinician at the point of treatment: “What is the one sign that means I should call you immediately?” The answer should be specific to your procedure, not a generic “if anything feels wrong.”
How UK regulations shape the follow-up process
The regulatory framework for UK aesthetic clinics is built around three pillars: CQC Regulation 12, JCCP SOP standards, and CPSA guidance. Together, they define what a clinic must document and deliver.
- JCCP SOP — mandates a minimum 15–30 minute post-treatment observation, written aftercare listing red flags and emergency contacts, and at least one offered follow-up appointment.
- CPSA standards call for 24/7 emergency contact access, including a deputising clinician when the treating practitioner is unavailable.
Your signed aftercare form should record: the product name and batch number, injection sites treated, the clinician’s name and registration details, before-and-after photographs, and your signature confirming you have read and understood the guidance. This is not administrative paperwork. It is your medico-legal protection and the clinic’s audit trail. Understanding the role of consultation forms in aesthetic safety helps you know exactly what to insist upon before leaving.
Pro Tip: Ask the clinic to confirm their CQC registration number. A CQC-registered clinic is inspected against Regulation 12, which means your aftercare documentation is subject to external scrutiny, not just internal policy.
How clinics communicate follow-up and why automation matters
Most clinics use a combination of channels: an in-room verbal briefing, a printed or e-signed aftercare form, an automated SMS for the 24–48 hour check-in, and email or a secure patient portal for longer instructions and photo uploads.
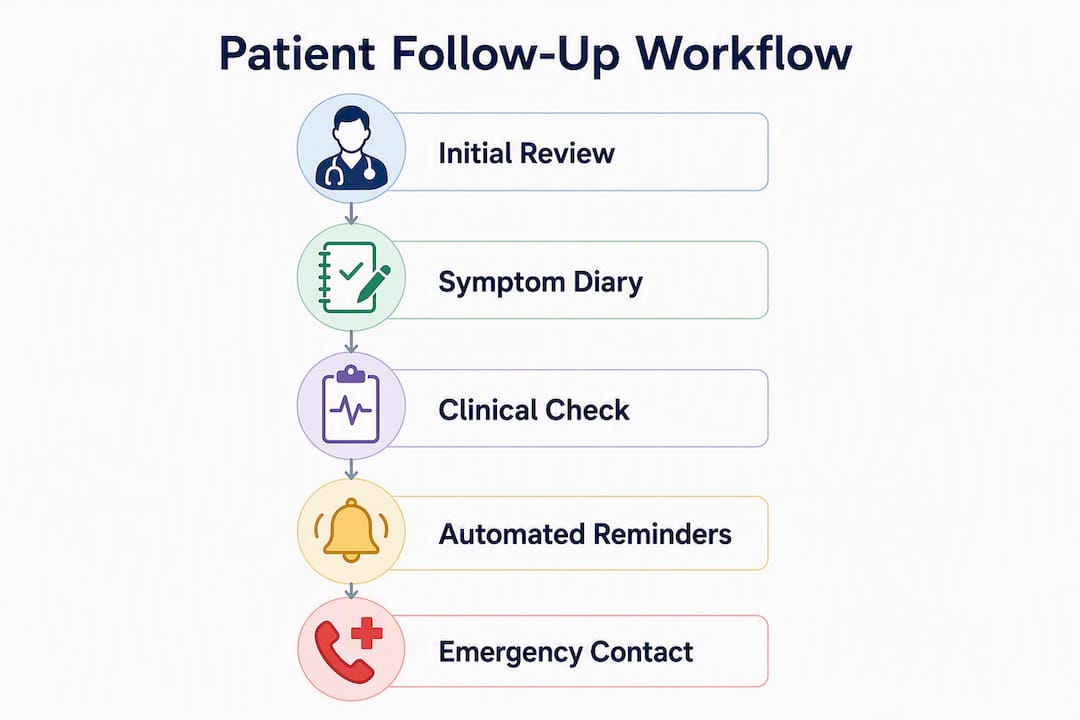
Automation is not a shortcut. Inconsistent messaging is the most common failure point in post-visit patient care, and automation ensures every patient receives the same clinically approved aftercare at the right time, regardless of how busy the clinic is that day. Clinics using automated follow-up sequences report substantially higher rebooking rates compared with clinics without a structured follow-up process.
When you receive a follow-up message, it should clearly identify the clinic, state what action (if any) is required, and explain how to submit a photo or reply if you have concerns. Secure photo submissions allow a clinician to triage your recovery remotely without you needing to travel in.
Pro Tip: Save the clinic’s SMS number in your contacts immediately after treatment. If a check-in message arrives from an unknown number, you may miss a triage prompt.
Red flags and exactly what to do if something feels wrong
Act on these signs immediately. Do not wait for a scheduled check-in.
Filler red flags requiring immediate escalation:
- Skin blanching (white or pale patches) near the injection site
- Dusky, mottled, or purple discolouration
- Severe or worsening pain disproportionate to the procedure
- Vision changes or eye pain after facial filler
Botox red flags requiring immediate escalation:
- Difficulty breathing or swallowing
- Severe drooping of an eyelid (ptosis) affecting vision
- Generalised muscle weakness beyond the treated area
Practical escalation steps:
- Stop massaging or touching the area.
- Photograph the affected site with a timestamp.
- Call the clinic’s emergency number and describe the symptom clearly.
- If no clinician response within a few minutes for a vascular sign, call 999 or go to A&E.
- Bring your aftercare form and product batch details to A&E if possible.
CQC-registered clinics are expected to provide access to a deputising clinician outside normal hours. If your clinic cannot offer this, that is a governance gap worth raising.
Pro Tip: Store the clinic’s emergency number under a contact labelled “Clinic Emergency” so you can find it quickly under stress.
How rebooking, touch-ups, and your two-week review work
After your clinical assessment, the clinician will typically offer one of three paths:
- Book a touch-up now — a small additional treatment to correct asymmetry or add volume, booked and consented at the review.
- Defer and monitor — results are still settling; a follow-up is scheduled in a further 2–4 weeks before any decision.
- Move to maintenance — results are satisfactory; a reminder is set for your recommended maintenance interval (typically 3–4 months for Botox, 6–12 months for fillers depending on product and area).
At a touch-up appointment, the clinician should document the additional units or volume used, update your consent form, and take new photographs. Ask to confirm these steps are being recorded.
Questions worth asking at your two-week review:
- “Is the result I can see now the final result, or will it continue to change?”
- “Is a touch-up included in my original treatment cost, or is there an additional charge?”
- “What maintenance interval do you recommend for my specific treatment?”
The appointment booking process for a review or touch-up should be straightforward. If a clinic makes it difficult to book a follow-up, that is worth noting before you commit to further treatment.
Key takeaways
A properly structured patient follow-up workflow includes a 15–30 minute post-treatment observation, procedure-specific signed aftercare, scheduled check-ins, and a 24/7 escalation route, all documented against your patient record.
| Point | Details |
|---|---|
| Immediate observation is mandatory | JCCP SOP requires 15–30 minutes of post-treatment monitoring before you leave the clinic. |
| Signed aftercare is your protection | Your form must list red flags, activity restrictions, and the emergency contact, and carry your signature. |
| Botox and filler timelines differ | Botox is assessed at Day 10–14; fillers need a 24–48 hour check and a 2–4 week review for settling. |
| Vascular signs are emergencies | Blanching or dusky discolouration after filler requires immediate escalation, not a wait-and-see approach. |
| Theaestheticsroom | Operates a CQC-accredited follow-up workflow with signed aftercare, automated check-ins, and clinician reviews at Knightsbridge, Harley Street, and Mayfair. |
Why follow-up is the part of aesthetics that actually matters
The aesthetics industry spends considerable energy on the treatment itself and comparatively little on what happens after. That imbalance is where most patient dissatisfaction and nearly all serious complications originate. A vascular occlusion after filler that is caught within the first hour has a very different outcome from one identified at a 48-hour check-in, and both are vastly better than one a patient notices alone at home with no emergency number to call.
The regulatory framework, CQC Regulation 12 and JCCP SOP, exists precisely because follow-up was historically treated as optional. It is not. The signed aftercare form, the 15–30 minute observation, the automated 24-hour check-in: these are not administrative gestures. They are the clinical infrastructure that determines whether a complication becomes a crisis.
Patients who understand this are better protected, not because they become their own clinicians, but because they know what to demand, what to photograph, and when to escalate. That knowledge is the real value of a transparent follow-up process.
Theaestheticsroom’s follow-up care and how to book
Theaestheticsroom operates a CQC-accredited patient follow-up workflow across its Knightsbridge, Harley Street, and Mayfair locations. Every patient receives a 15–30 minute post-treatment observation, a procedure-specific signed aftercare form, and an automated check-in sequence that begins within 24 hours of treatment. Clinician reviews are scheduled at Day 10–14 for Botox and at 24–48 hours plus 2–4 weeks for dermal fillers, with in-person and virtual review options available. A direct emergency contact is provided to every patient before they leave the clinic, with deputising clinician access outside normal hours.

To book a treatment, a review appointment, or a virtual consultation, visit Theaestheticsroom or contact the clinic directly. Whether you are booking your first treatment or returning for a maintenance session, the follow-up process begins from the moment your appointment is confirmed.
This article provides general information about aesthetic clinic follow-up standards in the UK. It is not a substitute for professional medical advice. Always confirm current guidance with your treating clinician or the relevant regulatory body.
Useful sources for further reading
The following authoritative UK sources underpin the guidance in this article:
- JCCP SOP for safe practice in non-surgical cosmetic procedures — the primary standard setting out observation periods, written aftercare requirements, and follow-up expectations for UK aesthetic practitioners.
- JCCP and CPSA Code of Practice, Third Edition (2023) — the overarching code governing practitioner conduct, patient information standards, and continuity of care requirements.
- CPSA Dermal Filler Standards — industry standards covering 24/7 emergency access, deputising clinician requirements, and written aftercare for filler treatments.
Recommended
- Medical Aesthetics Workflow Optimisation for Clinics – The Aesthetics Room
- Patient Journey in Aesthetics – Personalised Care Unpacked – The Aesthetics Room
- Appointment booking workflow for aesthetic clinics – The Aesthetics Room
- Why customize treatment plans for better aesthetic results – The Aesthetics Room