
TL;DR:
- A compliant gallery requires separate marketing consent, accurate documentation, and secure storage of photographs.
- Regulatory bodies emphasize transparency, proper consent, and strict management of images to ensure patient safety and legal compliance.
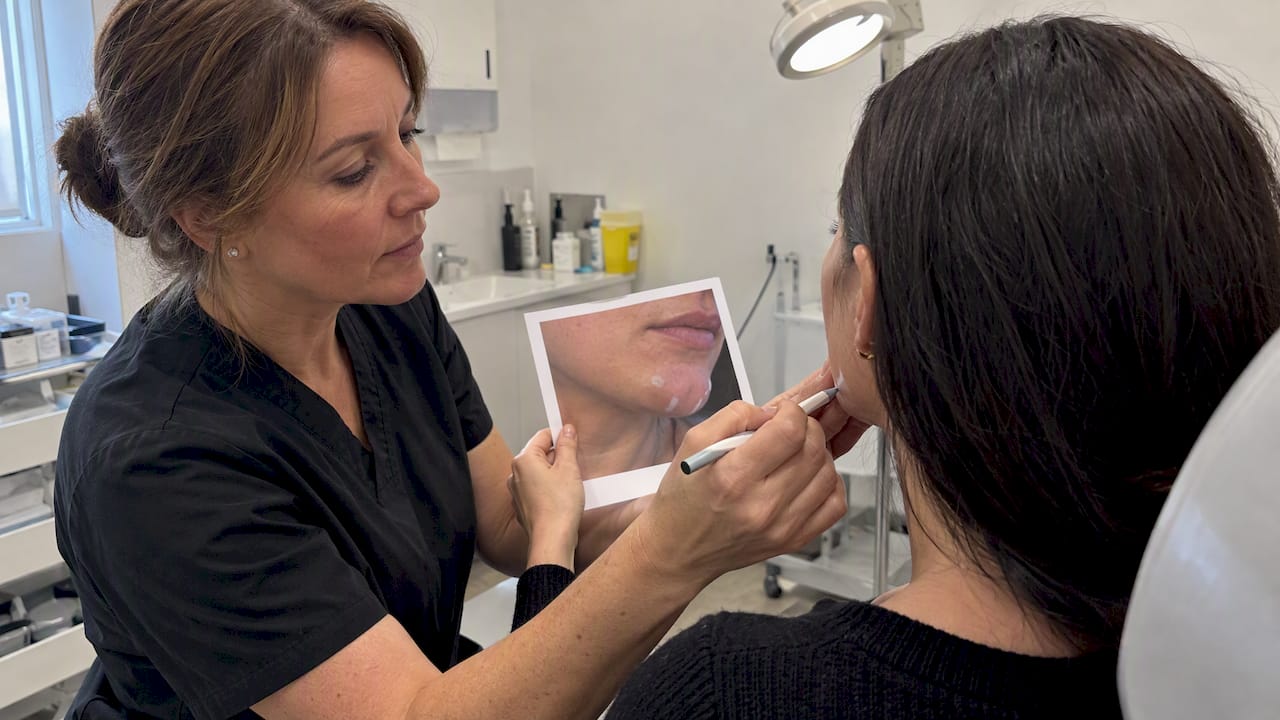
A compliant before-and-after gallery requires five steps: obtain separate written marketing consent, capture repeatable clinical photographs with logged metadata, record a documented editing policy, store images in a secure auditable system, and publish with expectation-managing captions and a clear removal process. The four regulatory bodies you must satisfy are the Advertising Standards Authority (ASA) and Committee of Advertising Practice (CAP) Code, the General Medical Council (GMC), the Care Quality Commission (CQC), and the Information Commissioner’s Office (ICO) under UK GDPR.
Your immediate action list:
- Obtain separate, signed marketing consent before any photography session
- Schedule a standardised photo shoot with logged camera settings and patient positioning
- Record EXIF metadata and link it to the patient’s consent record
- Store all images in a role-access-controlled, auditable clinical system
- Publish with practitioner credentials, treatment date, and a removal contact
Table of Contents
- What UK law and professional ethics require for clinical galleries
- How to collect and manage marketing consent correctly
- What photography standards make your images clinically robust?
- What edits are permitted, and how do you document them?
- How to store patient images securely under GDPR and CQC rules
- How should you present galleries online to stay compliant?
- How to embed gallery governance into your clinic’s SOPs
- Practical templates your clinic can use today
- How Theaestheticsroom manages gallery governance in practice
- Key takeaways
- Why gallery governance is a patient safety issue, not just a marketing one
- Useful sources for clinic policy and audit packs
What UK law and professional ethics require for clinical galleries
Four overlapping frameworks govern what you can publish and how you must document it.
The ASA and CAP Code require marketers to hold signed and dated documentary evidence that before-and-after photographs are genuine and have not been digitally manipulated. Rule 32 of the CAP cosmetic interventions guidance makes this explicit: the evidence must be retained and available for inspection. Separately, ASA guidance on cosmetic interventions warns that images implying the advertising of a Prescription-Only Medicine (POM) such as botulinum toxin are typically unacceptable. Frame your galleries around clinical outcomes and practitioner expertise, not the medicine used.
“Clinicians must work with patients to make sure expectations about outcomes are realistic and explain risks and complications clearly.” — GMC, About Cosmetic Interventions
The GMC’s guidance on recordings is equally clear: consent given for clinical records does not automatically permit marketing use. A separate, specific consent is required. The Royal College of Surgeons (RCS) reinforces this by requiring that patients have access to written and visual information so they can make genuinely informed decisions.
CQC inspectors look beyond paperwork. They expect to see staff who understand and consistently follow image-storage policies, not just a binder on a shelf. ICO and UK GDPR classify clinical photographs as special-category personal data, which means a lawful basis must be recorded, access must be restricted, and deletion must be actioned promptly on request.
How to collect and manage marketing consent correctly
Marketing consent must be a separate document from the clinical consent form. The GMC and CQC both require this distinction to be explicit and auditable.
Mandatory fields for a marketing consent form:
- Full patient name and date of birth
- Specific purpose (e.g., “website gallery”, “Instagram”, “printed brochure”)
- Media types covered (photographs, video, before-and-after comparison)
- Platforms and channels where images may appear
- Duration of consent (or “until withdrawn in writing”)
- Right to withdraw, including the withdrawal process and expected timeline
- Practitioner name and credential
- Patient signature and date
Example consent wording for a digital checkbox:
“I consent to The Aesthetics Room using photographs taken at my appointment for marketing purposes on its website and social media channels. I understand I may withdraw this consent at any time by contacting the clinic in writing, and that my images will be removed within 30 days of a confirmed withdrawal request.”
Store signed consent forms in the patient’s clinical record and link the form reference number to the image metadata. Log every withdrawal request with the date received, the action taken, and the date the image was removed.
Pro Tip: Before any ASA or CQC inspection, prepare a single folder per patient that contains the signed consent form, the corresponding image file with EXIF metadata, and any withdrawal correspondence. Auditors can then verify the full chain in minutes.
What photography standards make your images clinically robust?
Every before-and-after pair must be captured using the same controlled setup, with logged metadata linking the image to the patient’s consent record and the date of treatment.
Numbered photography session checklist:
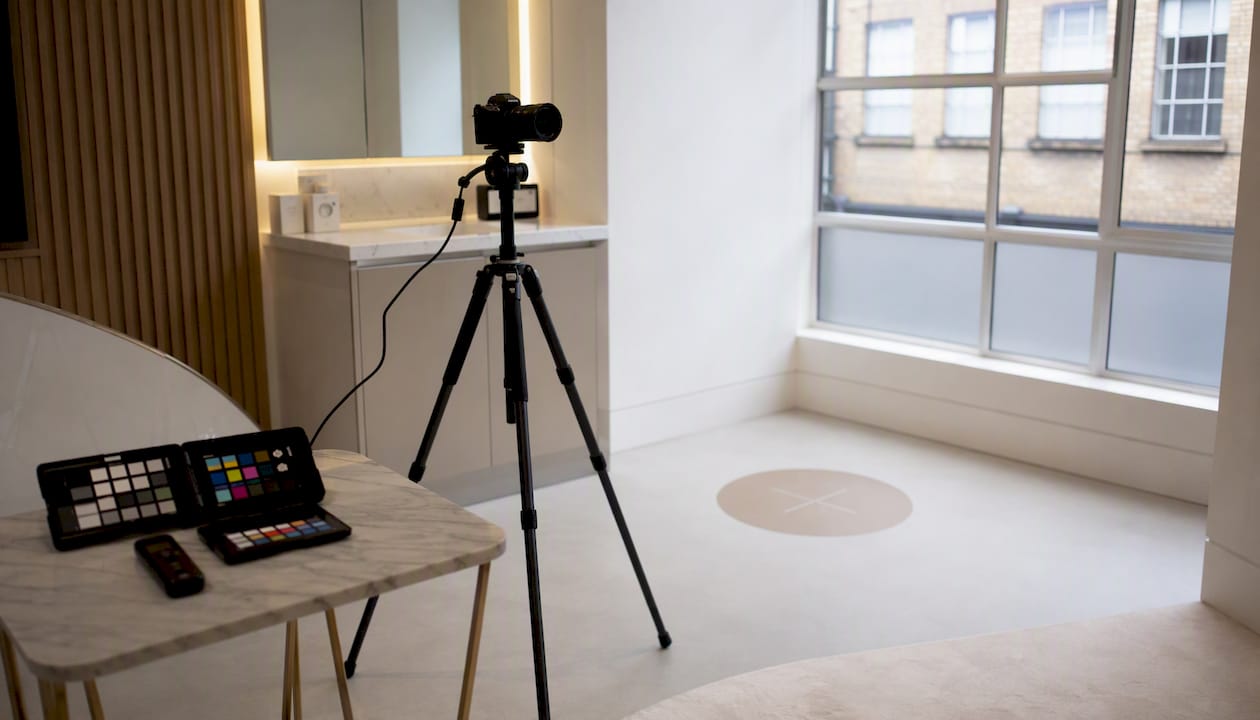
- Set up a neutral, plain background (white or mid-grey) in a dedicated, consistently lit room
- Position the patient at the same measured distance from the camera for every session
- Fix camera height at eye level; use a tripod or wall-mounted bracket
- Ask the patient to adopt a neutral expression and standardised pose (frontal, left lateral, right lateral, oblique views as required)
- Set white balance to a fixed Kelvin value matched to your lighting source
- Capture in the highest available resolution or RAW format
- Place a scale marker or colour calibration card in frame where clinically relevant
- Confirm EXIF data is enabled; verify date, time, and camera ID are embedded
- Log the session in the photography register: patient ID, consent form reference, practitioner name, camera used, settings
| Setting | DSLR (e.g., Canon EOS R series) | High-end smartphone |
|---|---|---|
| Resolution | RAW format | ProRAW format |
| Focal length | portrait focal length | 2x or 3x optical zoom lens |
| ISO | 100 | Auto, low-light mode off |
| White balance | Custom Kelvin (5500 K daylight) | Manual or locked preset |
| Aperture | f/8 | Fixed (hardware-dependent) |
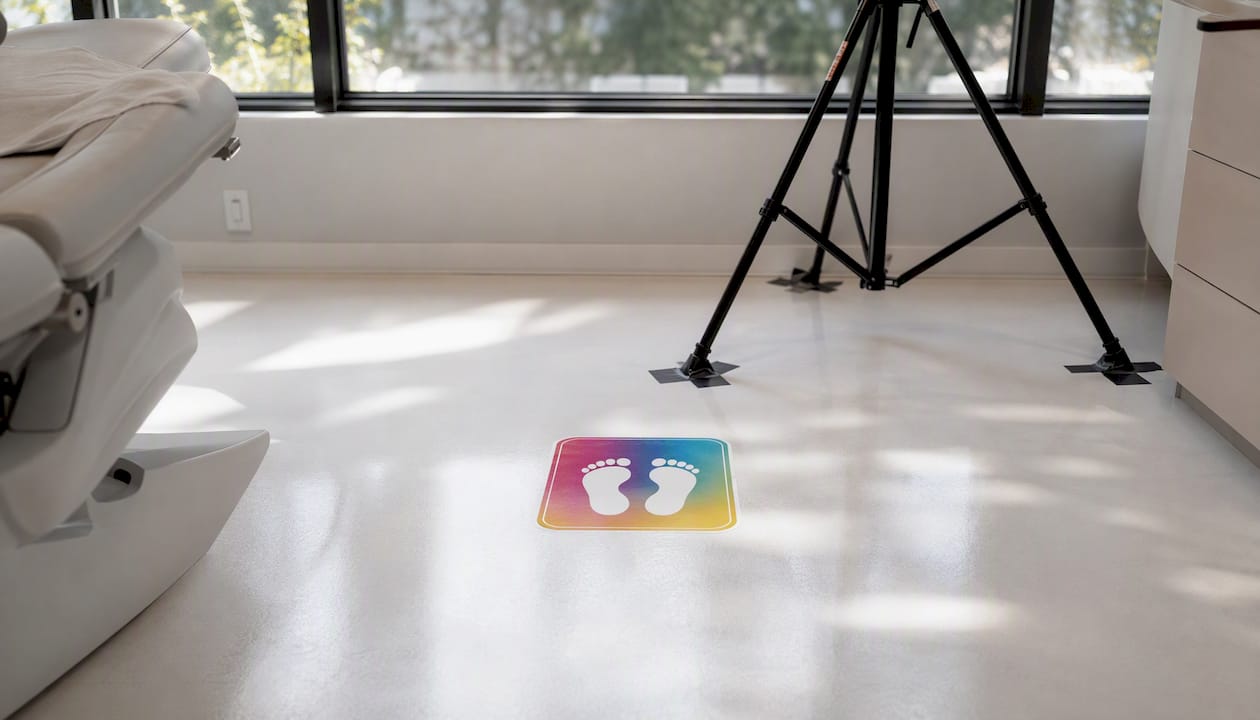
Pro Tip: Place a small coloured floor sticker at the patient’s foot position and mark the tripod legs with tape. At every follow-up shoot, reset to these marks before taking a single frame. This takes under a minute and eliminates the most common source of unfair comparison.
What edits are permitted, and how do you document them?
Minimal, non-representational adjustments are acceptable when documented. Anything that alters the clinical appearance of the outcome is forbidden.
Disallowed edits:
- Skin smoothing that changes perceived texture or contour
- Selective slimming or reshaping of any body area
- Adding or removing anatomical features
- Colour grading that makes the “after” image appear brighter or more flattering than the “before”
- Cropping that removes relevant anatomical context
The ASA expects marketers to retain production evidence showing whether retouching was carried out, and warns that disclaimers do not excuse a misleading impression if retouching affects performance-related areas.
Edit log fields to record for each image:
- Patient ID and image file reference
- Software used (e.g., Adobe Lightroom, Capture One)
- Operator name and date of edit
- Exact adjustments made (e.g., “exposure +0.3, white balance corrected to 5500 K”)
- Attestation: “No outcome-altering manipulation has been applied” — signed by the responsible clinician
Pro Tip: Store original RAW or highest-quality JPEG files in a separate, write-protected folder. The unedited originals are your primary evidence that no manipulation occurred. Never overwrite them.
How to store patient images securely under GDPR and CQC rules
Clinical photographs are special-category personal data. Secure systems, limited access, and documented retention are non-negotiable.
Record the lawful basis for processing marketing images (typically explicit consent) on your clinic’s Data Protection Impact Assessment (DPIA) or data inventory. The ICO requires this to be documented before processing begins.
| Image type | Recommended retention period | Notes |
|---|---|---|
| Clinical record photograph | Minimum 8 years (adult) | Follows NHS records management guidance |
| Marketing image (with consent) | Duration stated in consent form, or until withdrawal | Delete within 30 days of withdrawal request |
| Anonymised case study | As long as clinically relevant | Confirm no re-identification risk before publishing |
Access control checklist:
- Store all images on a clinic-managed, encrypted server or approved cloud platform — never on personal phones or unmanaged laptops
- Apply role-based permissions: clinical staff view clinical images; marketing staff access only consented marketing images
- Enable two-factor authentication for all accounts with image access
- Maintain an audit trail showing who accessed or exported each file and when
CQC inspectors expect to see staff routinely following these policies, not just a written procedure. Personal device storage is one of the most common inspection findings in aesthetic clinics.
How should you present galleries online to stay compliant?
Publish outcome-focused images. Avoid naming or implying specific medicines. Include the practitioner’s name and credential, the treatment month and year, and a short caption that sets realistic expectations.
Caption and accessibility checklist:
- Alt text describing the image content (e.g., “Before and after photographs showing lip volume results, three weeks post-treatment”)
- Legible font contrast meeting WCAG 2.1 AA standards
- Practitioner name and qualification next to each image
- Treatment date (month and year)
- A short disclaimer and a visible removal/contact link
Recommended disclaimer snippet:
For social media, treat every post as a permanent record even when the platform labels it ephemeral. Save a screenshot with the post date and caption text. If a patient requests removal, delete the post and document the action. Shares by third parties require a separate takedown request to the platform; log the date you submitted it.
For outcome-focused gallery pages that avoid POM promotion, see how Theaestheticsroom approaches Harley Street clinic positioning and natural-looking results without naming medicines.
How to embed gallery governance into your clinic’s SOPs
A single SOP with named roles and a scheduled audit cadence is the foundation. Without it, compliance depends on individual memory rather than clinic process.
Workflow: who does what at each stage
| Stage | Responsible role | Output |
|---|---|---|
| Consent capture | Reception / clinical coordinator | Signed consent form filed in patient record |
| Photography | Designated photographer / clinician | Logged images with EXIF, session register entry |
| Edit log | Marketing lead | Completed edit log, clinician attestation |
| Publish approval | Clinical signer + marketing approver | Dual sign-off record |
| Withdrawal response | Data controller | Removal confirmation, documented within 30 days |
“Effective governance is not just paperwork — CQC inspectors look for staff who can describe and demonstrate the process, not just point to a policy folder.” — CQC data governance expectations
Training should cover consent procedures, photography standards, editing rules, and withdrawal handling. Run scenario exercises at least annually: simulate an ASA challenge and a patient withdrawal request so staff know exactly what to do. Keep training records with dates and competency sign-offs.
Membership of the ACE Group (Aesthetic Complications Expert Group) supports quality assurance through peer review and shared best practice, providing an additional governance layer that CQC and patients recognise as a mark of professional commitment.
For a practical workflow framework, Theaestheticsroom’s medical aesthetics workflow optimisation guide outlines how to operationalise clinical and marketing steps within a single governance structure.
Practical templates your clinic can use today
Four templates form the core of a compliant gallery process. Each links directly to the patient’s clinical record and carries a version number and reviewer sign-off date.
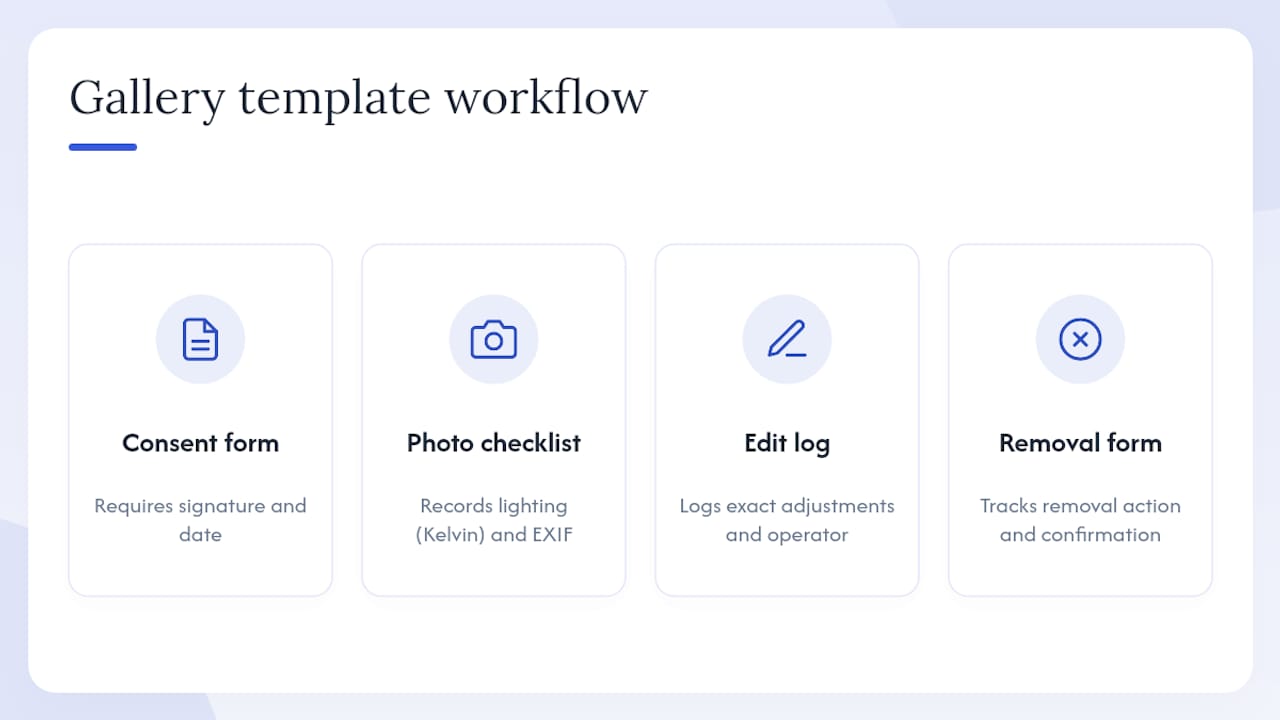
Template 1 — Marketing consent form: Patient identity, purpose, media types, platforms, duration, withdrawal process, practitioner name, signature, date.
Template 2 — Photography session checklist: Background setup, lighting Kelvin value, camera settings, patient positioning, scale marker confirmation, EXIF verification, session register entry.
Template 3 — Edit log: Patient ID, image file reference, software, operator, date, exact adjustments, clinician attestation signature.
Template 4 — Removal request form: Patient name, image description or URL, date of request, action taken, date of removal, confirmation sent to patient.
Store each template in the clinic’s shared governance folder alongside the SOP. Version-control with a date and the name of the approving clinician. Review all four templates annually or after any regulatory guidance update.
How Theaestheticsroom manages gallery governance in practice
Theaestheticsroom’s gallery process begins at the initial consultation. On day 0, the clinical coordinator presents the marketing consent form separately from the treatment consent, explains the purpose and withdrawal rights, and files the signed form in the patient record before any photography is discussed.
Photography takes place at a dedicated session using a fixed studio setup. The session register is completed immediately, linking the image files to the patient’s consent form reference and the treating practitioner’s name. Edit logs are completed by the marketing lead and countersigned by the responsible clinician before any image is approved for publication.
| Stage | Timeline | Evidence produced |
|---|---|---|
| Consultation and consent | Day 0 | Signed marketing consent form |
| Photography session | Day of treatment or follow-up | Session register, EXIF-embedded images |
| Edit log and attestation | Within 48 hours | Completed edit log, clinician sign-off |
| Publication | After dual approval | Publication record with date and caption |
| Withdrawal or audit | On request / quarterly | Removal confirmation or audit report |
“Our CQC accreditation and ACE Group membership are not just credentials — they reflect a commitment to governance that patients can see in every image we publish.” — Theaestheticsroom
When a patient requests image removal, the data controller logs the request, removes the image within 30 days, and sends written confirmation. Internal audits run quarterly, reviewing a sample of published images against their consent forms, edit logs, and session registers. Any gap found is documented as a corrective action with a named owner and resolution date.
Key takeaways
A compliant before-and-after gallery rests on one principle: every image must be traceable from patient consent through photography, editing, and publication to removal, with documented evidence at each stage.
| Point | Details |
|---|---|
| Separate marketing consent | Obtain a distinct, signed consent form before any photography — clinical consent does not cover marketing use. |
| Standardised photography | Use a fixed setup with logged EXIF metadata; link every image to the patient’s consent record and session register. |
| Documented editing policy | Record every adjustment in an edit log; retain original RAW files; obtain clinician attestation that no outcome-altering manipulation occurred. |
| Secure, role-controlled storage | Store images on encrypted clinic systems with role-based access; never on personal devices; delete within 30 days of a withdrawal request. |
| Compliant publication | Include practitioner credentials, treatment date, a results-vary disclaimer, and a visible removal contact on every published gallery. |
Why gallery governance is a patient safety issue, not just a marketing one
The conversation around before-and-after galleries in medical aesthetics tends to focus on ASA compliance and brand reputation. Both matter. But the deeper issue is patient safety, and that framing changes how a clinic should approach every decision in the process.
When a patient sees a gallery image, they are forming expectations about what a treatment will do for them. If that image has been subtly retouched, shot in flattering light that will never be replicated, or published without a realistic caption, the patient may consent to a procedure based on a false premise. That is not a marketing problem. It is a clinical one, and the GMC’s cosmetic interventions guidance treats it as such.
The clinics that handle this best are the ones that treat the gallery workflow as an extension of the consultation process. Consent wording, caption language, and the decision about which images to publish all carry the same weight as the clinical conversation about risks and outcomes. Strict governance does not constrain good marketing; it makes the marketing credible. Patients who trust what they see in a gallery are more likely to book, more likely to return, and more likely to refer others.
Useful sources for clinic policy and audit packs
Bookmark these official documents and download them for your inspection pack. Each covers a distinct aspect of gallery governance.
- ASA before-and-after photos advice — The primary reference for documentary evidence requirements and the prohibition on misleading visual claims.
- ASA/CAP cosmetic interventions advertising guidance — Detailed rules on POM advertising restrictions and production evidence retention.
- GMC — Making and using visual and audio recordings of patients — The definitive source on separate marketing consent and withdrawal rights.
- GMC — About cosmetic interventions — Covers realistic expectations, risk communication, and the clinical framing of marketing materials.
- RCS professional standards for cosmetic surgery — Patient information and visual resource requirements; useful for consent form drafting.
- ICO — Special category data — Lawful basis requirements, DPIA obligations, and deletion rights for clinical photographs under UK GDPR.
This article provides general information for clinic governance planning. It is not legal or regulatory advice. Confirm current requirements with the relevant regulatory body or a qualified professional before finalising your policies.
Recommended
- Harley Street aesthetic clinics: what patients need to know – The Aesthetics Room
- What is a boutique aesthetic clinic: personalised care explained – The Aesthetics Room
- How to optimise clinic scheduling: 2026 guide – The Aesthetics Room
- drmedispa.com alternatives: safe UK clinic options – The Aesthetics Room